
|
Whether you’re a flooring shop or a flooring installer, your clients appreciate the same thing
If there’s one thing that can run roughshod in short order over – and under – a hardwood floor, it’s moisture.
Often invisible and not immediately apparent until it’s too late, moisture issues with hardwood floors can run the gamut in how they present themselves. Regardless of the source, moisture can cause simple cosmetic issues (cracking, splitting) to much bigger problems such as rot and mold or the floor not fitting in the area it’s set.
Avoiding moisture problems for a hardwood floor in an application comes down to two key factors: 1. Having a full understanding of the potentials for moisture exposure long before each floorboard is put in place 2. Knowing how to use your hardwood floor moisture meter |
 |


Take a Deeper Dive Into Measure Moisture in Wood
Download our companion guide, "Why Wood Moisture Meters Are Used for Measuring Moisture in Other Materials."
[How to] Testing Moisture in Wood Floors During Installation
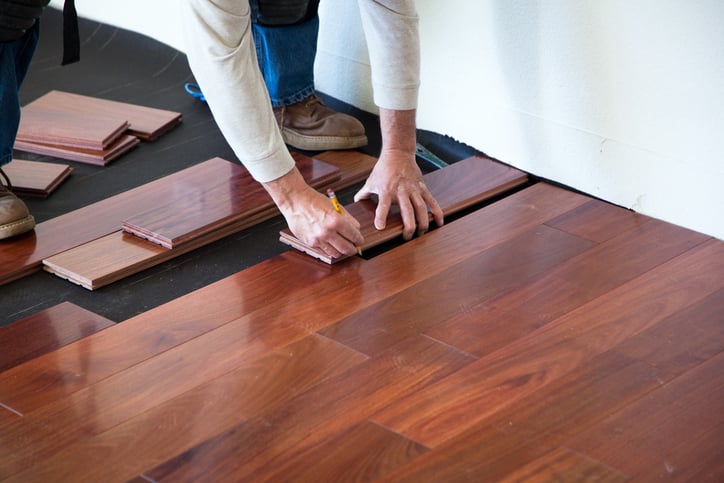 So how do you get ahead of moisture issues in hardwood flooring installation? It starts with conducting the right moisture tests and spending the appropriate amount of time on this.
In a general sense, testing wood floors for moisture during installation isn’t terribly different from testing wood during an inspection. You’ll use the same meters and collect the same types of results to make a final determination.
However, there are some key differences and a more involved process.
Measuring moisture in wood floors before installation takes time. You’ll spend a few days waiting between the initial run of measurements.
The #1 rule of thumb for installing wood flooring is to bring it into the space it will be put in and let it acclimate. Remember, wood is hygroscopic and it will equilibrate with the ambient conditions of the space it’s in. Prematurely installing wood flooring opens the doors to laying down lumber that will likely not fit later on when it does finally reach equilibrium.
Following National Wood Flooring Association Guidelines (NWFA), you’ll take three initial readings as part of your hardwood floor moisture tests:

- A relative humidity (Rh) measurement with a hygrometer of the space in which the flooring will be installed. Readings should be within the required range set by the flooring's manufacturer. Humidity levels beyond that range can cause the flooring to later fail or become damaged.
- A moisture content reading with a pin-type meter of the flooring itself. NWFA standards require testing "... a minimum of 40 boards for up to the first 1,000 square feet and an additional four readings per 100 square feet thereafter."
- A moisture content reading of the subflooring. For wood subfloors, you’ll use a pin-type meter. For concrete slab subfloors, you’ll use a hygrometer and the in situ method
You’ll repeat this process about four days later – the minimum amount of time unsealed flooring takes to reach equilibrium.
What’s an acceptable moisture level in hardwood flooring?
In general, moisture content in wood flooring should be between roughly 6-9% when ambient temperatures are between 60-80 F and Rh is between 30-50%. An EMC chart is a helpful reference to have on hand to compare readings. For wood subfloors, there should be no more than a 3% difference in moisture levels between it and the flooring. For concrete slab subfloors, Moisture readings should be between 35-40% humidity or 2-3% moisture content before laying flooring overtop.
If there are unacceptable discrepancies between the ambient environment, the moisture in wood floors, and subflooring, wait a few days and take measurements again. If the disparity persists, there’s likely another moisture intrusion issue that needs to be addressed – say moisture coming up through a concrete slab requiring installing a moisture barrier for hardwood floors.

Advanced Moisture Meter for Hardwood Floors Functionality: Wood Species Calibration
|
Wood is wood is wood, right?
Not exactly.
To an extent, for as many species of trees as there are in the world, there are that many calibrations you can make to your professional pin-type wood moisture meter.
While pieces of wood from different species may look and even feel the same, the simple fact is they are different, even nominally. Those nuances, which include density, porosity, and hygroscopic properties, can impact moisture meter measurements.
Consider hardwoods vs. softwoods. Both respond to environmental changes in humidity and temperature, but the rate and extent of this response can differ due to their structural differences. Because of their composition, hardwoods are more dense (thus, their strength) and have a different EMC value than softwoods. The differences in EMC and moisture interaction get more granular when you start comparing specific species, say maple vs. pine. Both types of wood can be in the same room, exposed to the exact same conditions, but still have different moisture content readings.
That’s where species calibration comes in. Essentially tuning the meter to the specific wood, species calibration, allows an inspector to get as accurate a moisture content reading as possible. Most good wood moisture meters have this functionality. The best wood moisture meters allow you to add calibrations for the exact species of wood you’re testing.
Why does this matter for hardwood flooring installation?
Taking wood species-specific readings gives you a better sense of actual moisture presence and the condition of materials in a space as well as accurately quantifying the hardwood floor moisture level. |

|
Testing Hardwood Floor Moisture Content After Installation
|
The only way to fix the problem is to not only identify the source, but also the extent of the issue. And the only way to do that is through a thorough and deliberate moisture survey.
Whether it’s from a flooding event, a subfloor moisture barrier failure, or some other anomaly, checking an installed hardwood floor for moisture is a simple process with immediate results. It’s essentially no different than how you’d conduct a moisture inspection in any other circumstance.
Your survey should start with a walkthrough to make an initial visual assessment. Having identified a few areas of concern, it’s time to start getting more granular and take moisture readings with both a pinless meter and a pin-type meter (or dual-function meter such as the SurveyMaster).
|

|
With a Pinless Meter1. Place the meter on the surface of the area being tested 2. Allow a few seconds for a reading 3. Record the reading
Non-invasive meter readings do not give 100% confirmation of moisture; they help you quickly locate areas that should be investigated further. |
With a Pin-type Meter1.Set your meter to the correct wood species for the floor 2. Touch the meter’s pins to the surface of the hardwood floor 3. Take readings from different spots and average the results.
Note the moisture level displayed on the meter each time you take a reading. |
With your inspection results, your investigation can continue with more specificity in knowing exactly where to dig in deeper, so to speak, to find the source of moisture intrusion or begin making the appropriate repairs.